DIY: Leather Cord Charm Bracelet

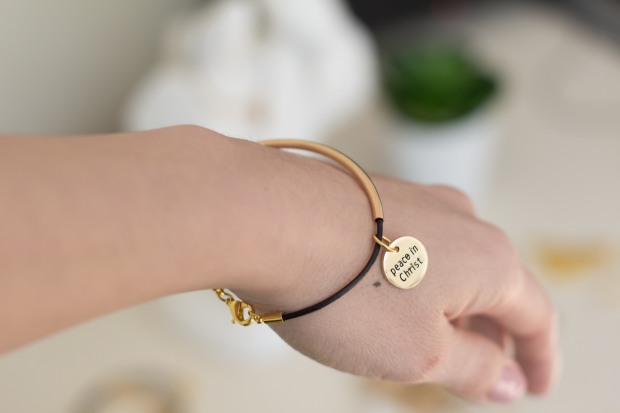
DIY Leather bracelet Main pic.jpg

Another year has flown by with 2018 looming just over the last page of our dogeared  calendar; and I was just getting used to writing 2017 on all the kids’ school forms/permission slips.  The fam-bam and I packed so much in this year yet that feeling of regret over having lost another year, time we won’t ever get back, and all the to-do’s that never got “do-ed”, leaves me in disbelief at how time really does, literally, fly.  But just like I get a fresh, new slate daily, it’s time for my annual fresh, new slate.  Yeah, you shouldn’t wait for the new year to set and evaluate your goals and progress, but the new year is always a perfect time to do just that.  So, yes.  I’m saying a triumphant ‘goodbye’ to 2017 and I am ready to receive 2018 with open arms.  But first, let me get through this Christmas rush while I try to reverence the true meaning of the season with my little ones amidst all this commercialism.  And since Christmas and gift-giving go hand-in-hand, here’s a little DIY tutorial for a shiny, little something to put under your Christmas tree.

I work with a church youth group of girls ages 12-17 yrs and every year the leaders put together a little birthday gift for the girls and drop it off for them on their birthday.  So while brainstorming gifts, I stumbled across an image of a leather cord bracelet with gold tubing that would be perfect but way out of our budget to purchase.  Plus, we wanted to incorporate the new year’s youth theme into the gift as well.  After doing some research, (hrs upon hrs, ok not really) I figured out a way we could make the bracelets ourselves for about $3 each including a charm etched with our new theme!  I was pretty ecstatic because they are so cute and I know the girls will love it!  (One can hope)

I added links to places where I purchased the material, but I was buying in bulk so you may want to purchase smaller batches.

DIY Leather Cord Charm Bracelet w/ Gold Tube

Materials:

Tools:

  • scissors
  • jump-ring tool (I just used my fingers)
  • E6000 & Super glue (or Gel Superglue, Gel Gorilla glue)
IMG_5090-1

I guess gold comes in different hues… Luckily the charms and the gold tube matched while the end caps were a little more yellow, but I made it work.

IMG_5116-1

What you’ll need to make one complete bracelet. (plus the glue)

Instructions:

IMG_5119-1

  1. Cut desired length of leather cord. (My finished bracelet size is 7 inches.  Measure wrist for accuracy but that seemed to be a good size for most of the girls.  You want the length of your leather cord and the clasp to total your desired bracelet length)IMG_5121-1
  2. Thread the cut cord through the gold tube bead.IMG_5120-1
  3. Add the charm. (I had to switch the jump ring on my charm to an 8mm jump ring in order for it to fit over the gold tube)IMG_5122-1
  4. Add a dab of glue to each end of the leather cord and gently insert into the end cap clasp. (if using E6000, let dry few mins, then pull back out and add a dab of super glue.  E6000 by itself came out with a tug test) (If using gel super glue or gel gorilla glue, then just glue once and done)* Let it dry overnight.

*I had E6000 glue already from a past project and thought that would suffice when gluing on the end caps, but when I tested it with a tug the next day, it slipped out fairly easily.  So I added a dab of super glue (runny kind) and it held tight.  I decided to get gel gorilla glue and that by itself held well.  Use what glue works for you.

IMG_5108-1

SUPER EASY and SUPER CUTE!!!

IMG_5080-1.jpg

I hope you made one for yourself, too~

Thanks for reading-  Wishing you a Merry Christmas and Happy Holidays (however you may celebrate)!

-Flora

Handmade Hanbok for My Girls

img_2952-18pmEvery year at the new cycle of the lunar calendar, there ensues in our household, a discussion between my Korean self and my Chinese husband about the ‘political correctness’ of calling the New Year holiday “Chinese New Year” vs. “Lunar New Year” (instigated by me, of course).  My husband is all for calling it “Chinese New Year” which is not THAT big of a deal, since the Chinese do celebrate it so extensively, (but then it sort of is) so I’m left wondering why my children are bringing home art and “Times” pamphlets from school solely about “Chinese” New Year  and how it’s celebrated by the Chinese, when there are over 20 other countries that celebrate it as well. But I’m not here to start a debate on one or the other, we’ll save that for another time.  I AM here to share how my latest sewing project has turned out and I think they turned out nicely, if I say so myself.

0130171508a

My “A” has long since grown out of her Hanbok (Korean dress) and my “C” probably wore her  First Birthday Hankbok for the last time last year.  Last Lunar New Year 2016, my A wore her Chinese dress and my C wore her Hanbok, which nicely represented their Korean and Chinese heritage.  This year, the girls wore their Chinese dress on Saturday and wore their Korean Hanboks on Sunday.  I’d been wanting to make a hanbok for my girls for years now, but never got around to tracking down a good hanbok pattern until this past Christmas season when I pulled the trigger and bought a Korean Dress pattern book on Etsy.  It was mailed to me in California from South Korea and it took about 2 weeks to get the book.  I bought it here on Etsy

img_2894-1

I offered to make a Korean boy’s outfit for my son but he wouldn’t have it.  He said he would never, ever wear it… makes my life easier.  He also refused to wear a Chinese jacket sent from his grandpa in Hong Kong… But what can you do? You move on and make cute things for the girls while they’ll still wear it.

img_2938-10

I love the bright and vibrant color combination of C’s hanbok (right) with the little floral design top.  Hanboks are traditionally more vibrant in color and I wonder if I should have picked a bright, mustardish- yellow for A’s hanbok skirt (left) instead of pink to go with her mint top.

Did you notice that the girls’ hanbok bows are on opposite sides?   I made C’s hanbok first (left, below) and accidentally reversed the front bodice pattern pieces and ended up having to put the tie on the incorrect side.  I didn’t have enough fabric to fix the mistake so I figured I would just finish it and no one would really notice… unless you put side-by-side photos of them together like so…

hanbokcollageSo the mint/pink Hanbok has the correct tie placement on the right side of the Jogori (top) with the 1-bow pointing to the left.   (Yes, it does matter, but let’s just assume for C’s hanbok it doesn’t)

img_2905-1

This is the skirt portion of the hanbok that you wear under the Jogori (top).  It’s basically a wrap skirt/dress and you bring the ties to the front and tie to secure.

img_2967-26

The pattern book is all in Korean but it has good step-by-step photos that illustrate each step that made it fairly easy to follow along.  They do use specific vocabulary associated with the pieces of Hanbok that I had to look up, and the book does have a handy picture chart with labels and their corresponding names.

img_2966-25

I think I got the hair right… I recall from watching Korean dramas (yes, Korean dramas, an excellent source) set in the old Joseon time periods usually having a small braid on the side, woven into one long braid in the back for girls and I think it was buns for married women.  Regardless, the girls looks adorable with their braids and hanbok.

img_2964-23

A and C tried to convince me to wear my hanbok to church with them, but I didn’t really want to wear my hanbok from my wedding (which comes with a huge petticoat) to 3 hours of church.  Maybe next year girls… and that’s a BIG MAYBE.

Thanks for reading and Happy Chinese, Korean, Lunar New Year !!!

-Flora

Quick Rice Cooker Castella

1230161527a-1pm

I hope you all had a wonderful holiday season!  This is going to be a quick post on an easy and quick recipe that I saw today and just HAD to try right away.  I was browsing FB and saw this video:  https://www.facebook.com/dingo.food/videos/854615187974792/

Bake a cake in a rice cooker????  say what???1230161535-1pm

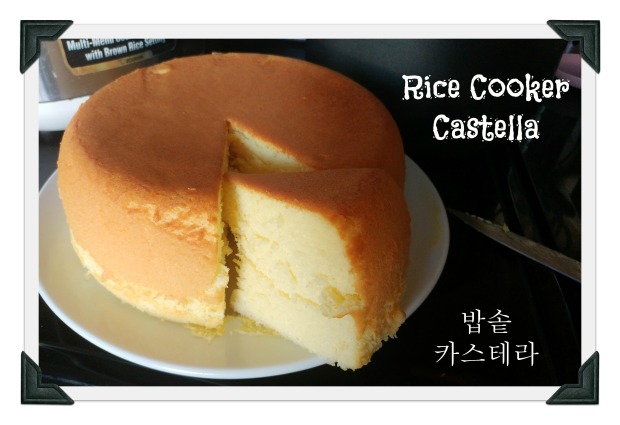
I always wondered why my Zojirushi Rice Cooker had a “cake” button and who would be crazy enough to bake a cake in their rice cooker… I guess I was crazy not to try it sooner!  At least with this Castella recipe, the rice cooker was just the right amount of heat and steam to make a fluffy, light, and airy Castella cake, which is basically a type of sponge cake, but a far cry from those dry sponge cakes that need to be soaked with syrup.  It’s a childhood favorite growing up and now my own children have adopted a love for them as well. Try it with a tall glass of milk!  You’re welcome.

And without further adieu, here are my converted measurements for the ingredients which were all in grams.  (If you know Korean and you watched the video, you may have noticed I substituted Mirin for Soju, since that’s what I have in my pantry and we don’t have soju in our home.)

1230161529a-1pm

Quick Rice Cooker Castella

Ingredients

  • 6 large eggs, separated
  • 1 cup granulated sugar, divided into 1/2 cups
  • 1 TB Mirin
  • 1/3 tsp salt
  • 2  1/2 TB honey
  • 1  1/2 cups cake flour
  • 4 TB oil (canola, vegetable)
  • scant 1/4 cup milk

Directions

  1. Grease your rice cooker with Canola oil spray.
  2. Whip 6 egg whites in a clean stand mixer with whip attachment and add 1/2 cup sugar in 3 increments until stiff peaks form.  Set aside.
  3.  Whip 6 egg yolks with 1/2 cup sugar.  Add the Mirin, salt, and honey and whip.  Add the cake flour and mix.
  4. Fold in a third of the meringue (egg whites) into the yolk batter and carefully fold in.  Add another third and fold.  Finally, add the remaining meringue and fold.
  5. Mix the oil and milk together then fold into the batter.
  6. Pour the batter into greased rice cooker pot and push your “cake” button or the video says “steam” setting for 60 minutes.
  7. carefully invert the cake out of the pot onto a plate, cool, and eat!

*Note: the top of the cake will look pale when you open the rice cooker and you may wonder if the cake is “cooked” through.  You’re welcome to try the toothpick test,  but it was nicely browned on the bottom of the cake (which becomes the top when you invert it).

1230161543-1pm

Now go and try it yourself!!!  I’m  never baking my Castella in the oven again!!!

Thank you for reading and Happy New Year!!!

-Flora

Steamed Korean Buns

img_1882pm

It’s a cold, rainy day here and I’m enjoying just shuffling around the home and being grateful for the warmth, shelter, and food in our tummies.  I’ve got a little slot of time before the Thursday afternoon madness resumes  so I thought I would post an old-time favorite snack of mine that we made a while back but I never got around to posting.  If you noticed my last post was some time ago … there’s been some crazy real estate swapping that went on which kept me just a bit preoccupied.  I’m the type that likes to concentrate on one thing at a time and feel frazzled if I have too much going on and of course I ended up starting a part-time job at the same time we decided to sell and buy…  so there’s my excuse 🙂

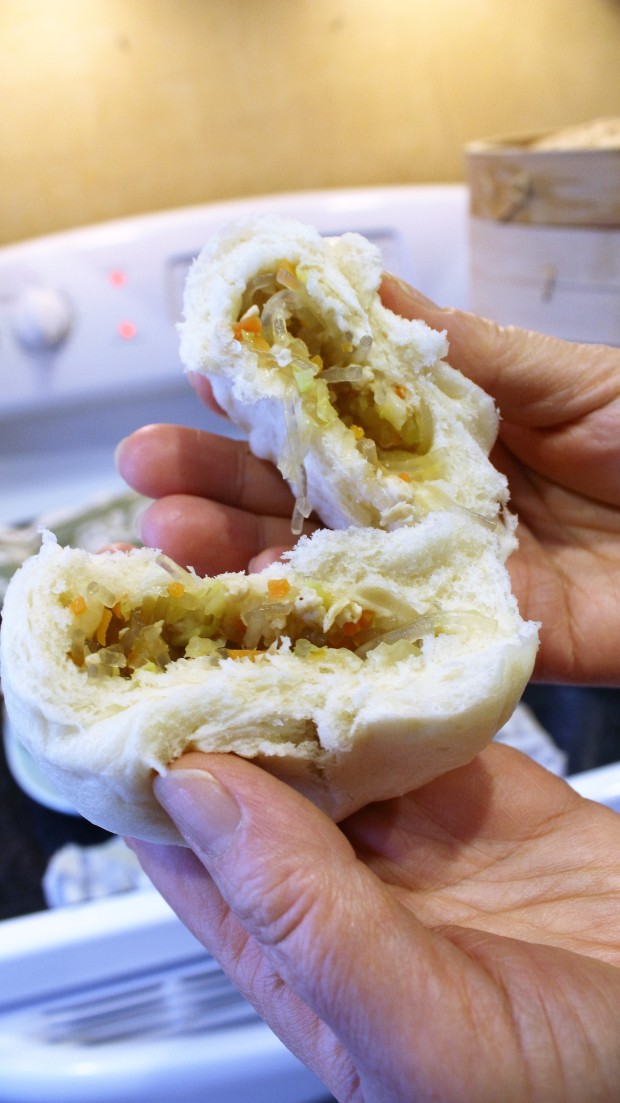
Back in SoCal, I loved walking through our big neighborhood Korean grocery store and walking to the back of the store where they made “Wang Mandoo” and sneaking a pack into the grocery cart.  “Wang” means king and “mandoo” means dumpling.  So you can imagine they were giant, softball-sized dumplings filled with my favorite “Japchae” or glass noodles.  The slightly sweet steamed bun exterior mingled with the savory beef and veggie japchae interior was perfection that would leave you feeling like the “after” of a Snickers Bar commercial.

I found this recipe for steamed Korean buns many years ago on a Korean baking site, and it’s just perfect when you live 30 mins from the nearest Korean store (compared to 5 mins growing up) and you do not want to do the Caldecott Tunnel but you want some “Wang Mandoo”.  Plus, homemade is always better, right?   The recipe was all in grams so I measured all the ingredients into volume measurements for my own sake and I’m sharing them with you.  I didn’t notice any difference in the result when I used my converted volume measurements to make them again and again.

I made two different fillings for my buns: “Wang Mandoo” with Japchae filling and “Hobbang” with sweet red bean paste filling.

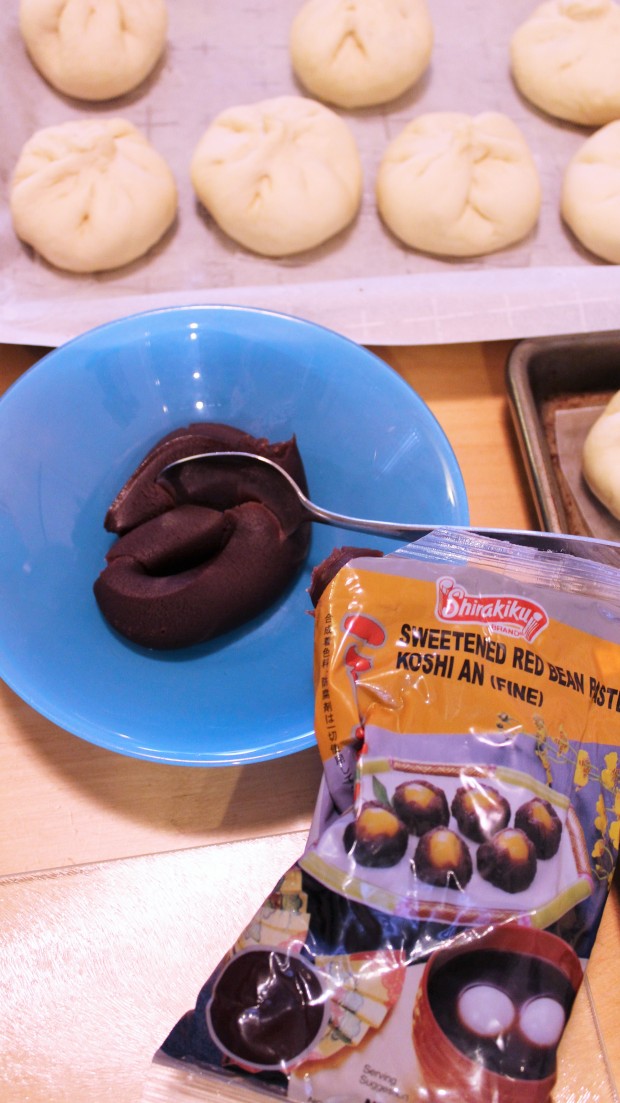
You can use my Japchae recipe here for the “Wang Mandoo” and the red bean paste filling was purchased at my past Korean store excursion.  You can really put anything you want inside the bun, Spam and kimchi is super yummy, too!  Or you can just make buns without any filling!  I made both japchae filling and the red bean paste filling and they were both so delicious!  Would be perfect for this cold, rainy day… wish I had some right now.

img_1843In a large mixing bowl, mix together the flour, baking powder, yeast, sugar, salt, and dry milk powder.

img_1847Add the warm water and mix/knead until dough forms.  You can use a stand mixer with a dough hook attachment.  Once you have a ball of dough, add in the oil and knead until you have a nice, shiny dough that isn’t sticky.

img_1848Divide the dough into little balls (60 gram balls, about the size of a golf ball).  Place on a baking sheet lined with wax paper, cover with clean cloth and let rest for 15 mins.

img_1861Flatten a ball of dough and fill with desired filling of choice.  Pinch ends closed then place onto a square of wax paper.  (If not using filling, just place ball of dough onto wax square)

Watch my mom pinch and close the dough for the bun.  Apologize for the static background noise.  watch with sound off 🙂

img_1866

This is my store-bought Red bean paste

img_1870

Traditionally for the “Wang Mandoo” you place the seam side facing up and for the “Hobbang” you place it seam side down.

img_1871Let dough rise in a warm place for 30 mins

img_1872While the dough is rising, start heating your pot of water for the steamer over med high heat

img_1874Place the dough into the steamer (don’t over-crowd, they will grow) once the water is boiling and you see steam rising.  Steam for about 10 mins. Don’t open the lid while steaming.

img_1882

And Voila~ beautiful, fluffy, warm, delicious buns!!!

Steamed Korean Buns Recipe (왕만두/호빵)

Makes: about 2 dozen buns

Ingredients (Bun)

  • scant 3 cups all purpose flour
  • 3/4 TBS baking powder
  • 1 1/2 TBS dry yeast
  • 1/3 cup granulated sugar
  • 1 tsp salt
  • 2 TBS non-fat dry milk powder
  • 1 cup warm water (more or less)
  • 1/6 cup vegetable or canola or grapeseed oil

Filling

Japchae Recipe or store-bought Red Bean Paste or be creative! 🙂

Directions

  1. Prep: cut out 24 little 3″x 3″ squares of wax paper.
  2. In a large mixing bowl, mix together the flour, baking powder, yeast, sugar, salt, and dry milk powder.
  3. Add the warm water and mix/knead until dough forms.  You can use a stand mixer with a dough hook attachment.  Once you have a ball of dough, add in the oil and knead until you have a nice, shiny dough that isn’t sticky.
  4. Divide the dough into little balls (60 gram balls, about the size of a golf ball).  Place on a baking sheet lined with wax paper, cover with clean cloth and let rest for 15 mins.
  5. Flatten a ball of dough and fill with desired filling of choice.  Pinch ends closed then place onto a square of wax paper.  (If not using filling, just place ball of dough onto wax square)  Traditionally for the “Wang Mandoo” you place the seam side facing up and for the “Hobbang” you place it seam side down.
  6. Let dough rise in a warm place for 30 mins
  7. While the dough is rising, start heating your pot of water for the steamer over med high heat
  8. Place the dough into the steamer (don’t over-crowd, they will grow) once the water is boiling and you see steam rising.  Steam for about 10 mins. Don’t open the lid while steaming.
  9. Carefully remove and enjoy your steams buns!!!
img_1880

Before my mom devoured hers 🙂

I’m going to get my butt out to the Korean store soon.  My stock of Korean ingredients is dwindling… probably when it stops raining.  Yes, I’m spoiled with good weather here and don’t go out when it rains… and my parents live in WA… ha.

Thanks for reading and stay dry and warm out there!

-Flora

Toki Hops, Toki Sews

IMG_2245pm

“Toki” (rabbit in Korean) hops to it this Easter, but not soon enough and only finished one dress for my two girls!  Uh-Oh.  Good thing I pulled out a pretty satin dress with coral flower prints on it that the older one outgrew and was brand spankin’ new to this younger girl so we avoided a possible melt-down.  Whew!  Well, actually, if my younger girl didn’t get a dress, she probably would have pouted for a second then forgotten about it.  She’s pretty easy-going and very forgiving, which is a blessing since I’ve supposedly (according to some health articles) lost memory brain cells every time I had another child; quite unfortunate for all children involved.

IMG_2244pm

Speaking of memory loss, I really wish I could remember where or when I got this pretty fabric, but I bought a lot of it (maybe 5 yards) and I had been saving it for a special occasion to make a dress out of it.  Not only is the big watercolor floral prints just beautiful, but the material itself is gorgeous; silky yet thick, definitely isn’t slippery, and doesn’t wrinkle too much.  Perfect material for a dress!

IMG_2241pm

I revisited my favorite little girl’s dress pattern “The Fairy Tale Dress” by Oliver+S.  I bought the digital pattern, downloaded off the site, printed and pieced the pattern sheets together, and traced the pattern pieces for the correct sizes and view of the dress.  I made this dress in the size 6 and it fits my 6 yr old just right with a little growing room.

This is definitely a very “nice” dress, fully lined bodice, sleeves, and skirt with a layer of tulle with the skirt lining to create more lift and “fluff” to the skirt and has an invisible zipper.  It is a beautiful end product.

PicMonkey Collagepm

I used this pattern last year to make the above dress in a gorgeous blue and green print with the green Peter Pan collar and big green sash in the back.  I followed View B of the pattern to the T and loved how it turned out. Although, I did think the front waist could use a little sash because it did look a little “boring” aside from the collar at the top.  I do absolutely LOVE the big bow/sash in the back though.

IMG_2246pm

This time, I made View A from the pattern with a few adjustments.  I got rid of the Peter Pan collar and cut the neckline out into more of a boat-neck rather than a very high-neck round.  I also used piping around the tulip sleeves and piping around the waist by using matching purple fabric with some cording to make the piping.  I bought very light gray cotton fabric to line the inside of the dress.
IMG_2248pm

I LOVE how it turned out!   I think i spent a total of about 8-10 hours on this dress.  I procrastinated and started it Friday evening, stayed up until 1am, then worked on it again off and on Sat afternoon and into the wee hrs of Sat. night.  Good thing this dress will be handed off to my younger girl later so we can get as much mileage out of it before they both outgrow it.  Very spring and a nice sophisticated little girl’s dress perfect for this special Easter season where we remember the miracle and love of our Savior!

0326161621

We had gone to the town Easter Egg Hunt for the last 2 yrs but didn’t go this year due to a busy game schedule, but luckily a friend was hosting one in her lovely backyard so the kids got a hunt in this season. We also did a cute scavenger hunt from Pinterest where they followed clues to find 3 big (plastic) eggs filled with candy (of course) at the end of it. They LOVed the clues and my oldest boy has since made a scavenger hunt for his two younger sisters and one for my husband and I with a lovely note at the end of the hunt.

0329160722b

Hope you had a wonderful Easter weekend and a nice spring holiday for others.

As always, thank you so much for visiting and please subscribe!

-Flora


Birthday Wishes… Shopkins

Avie2016_party (24 of 39)pm

My little girl just had a birthday; and of course no birthday celebration is complete without a cake topped with birthday candles to wish on before they are extinguished in one (or a few) puffs, which concurrently blankets the cake with tiny droplets of birthday girl germs.  But we digress… let them eat cake.  Germs are everywhere.  Besides, this cake is bulletproof!  It’s covered with homemade marshmallow fondant which no one likes to eat anyway.  I just peel mine right off and get to the good stuff: 4-layers of moist chocolate cake, devil’s frosting, and french vanilla frosting just under the peel, err… fondant.

I’m definitely not a fondant fan, but I must admit that certain cake requests (like this Shopkins cake) does require edible modeling clay to achieve that smooth, plastic look of a toy.  Most of my cakes are covered in buttercream or whipped cream, but I made an exception for this one since I didn’t think tinted buttercream would look as nice as fondant would.

My little princess got 2 birthday parties!  One on her actual birthday with family, including grandma who was in town, and her second party with a little group of friends at our humble home for a night of pizza, “Snow White” the movie, popcorn, and cake, followed by a spontaneous game of balloon war; organized chaos at it’s best!

Avie2016_party (23 of 39)pm

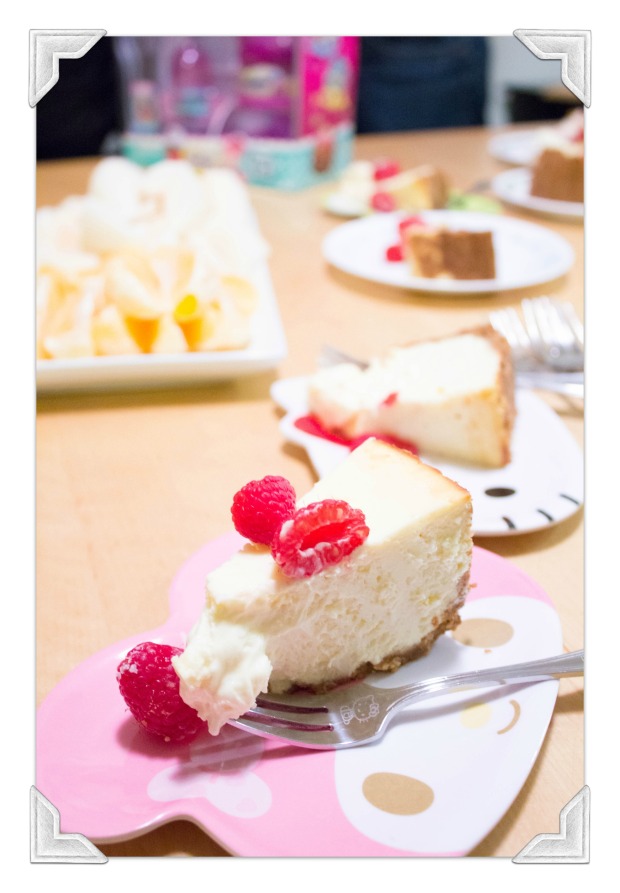
Of course I used Ina Garten’s Cheesecake recipe but without the jam, just topped with fresh raspberries.

So lucky mommy (yes, that’d be me) got to bake a cheesecake for her family party and this cute Shopkins cake for her party with her friends and I’m going to share my Shopkins cake construction process.

Little princess wanted a chocolate cake, so little princess got a chocolate cake for her special day.  I used Toba Garrett’s chocolate cake recipe from her book “The Well-decorated Cake” and I promise it’s the BEST chocolate cake you will ever taste!  She claims it’s good to the last crumb, and believe me, it is!  For the filling, I made a HUGE mistake and accidentally  made chocolate icing!!!  Like the kind that you drizzle over desserts for the nice chocolate-spilling-over-the-edge look, and that doesn’t work for a cake filling unless you want a “Sleeping Beauty” type of cake look with all the layers sliding and frosting dripping and the whole cake leaning like the Tower of Pisa.  That’s why, my friends, we should stick to tried and true recipes when attempting a special cake for a special occasion.  Lesson learned.  SO, instead of dumping the chocolate icing, I just doctored it by adding more butter and powdered sugar and it was fixed!  Now, I had delicious devil’s chocolate icing buttercream that was perfect layered with the chocolate cake.

After that detour, I decided I didn’t want to risk the dark brown color of chocolate frosting possibly showing through the light yellow fondant so whipped up a batch of our favorite vanilla frosting, which is also found in Toba Garrett’s book (see above link) called French Vanilla Buttercream.  This buttercream tastes like vanilla ice cream and has a texture that’s lighter and in between a buttercream and whipped cream.  Definitely one of my go-to recipes and have used it in many of my past cakes.

Shopkins (1 of 24)pm

I made 2 batches of marshmallow fondant and colored one batch yellow then left a larger part of the 2nd batch white and colored some pink and a little black.

Shopkins (2 of 24)pm

I wanted a taller, cake but I didn’t want to bake a 3rd cake, so I cheated and used my inverted cake pan as my 3rd cake layer to give the cake more height.

Shopkins (3 of 24)pm

I was in a rush and wasn’t careful removing my 2nd cake from the pan and it broke in several places!

Shopkins (4 of 24)pm

see how much of the outside broke off?!?!

Shopkins (5 of 24)pm

But it’s okay!  Just take those broken cake crumbs and mix it with your frosting and now you have chocolate cement to fill in the cracks.  (This is also how you can make cake pops.  crumble cake, mix in frosting, shape, and stick onto sticks)

Shopkins (6 of 24)pm

Whew, there. Now the cake is good as new 😉

Shopkins (8 of 24)pm

I split my 2 cakes in half so I got 4 layers.  Put some frosting on my “fake” cake layer then stack cake, frost, stack cake, frost… you get the picture.  I purposely left the top layer rounded since I wanted to keep the rounded look for the Shopkins Wishes cake.  Refrigerate your stacked cake for about 30 mins so it’s easier to cover with frosting and doesn’t shift.
Shopkins (9 of 24)pm

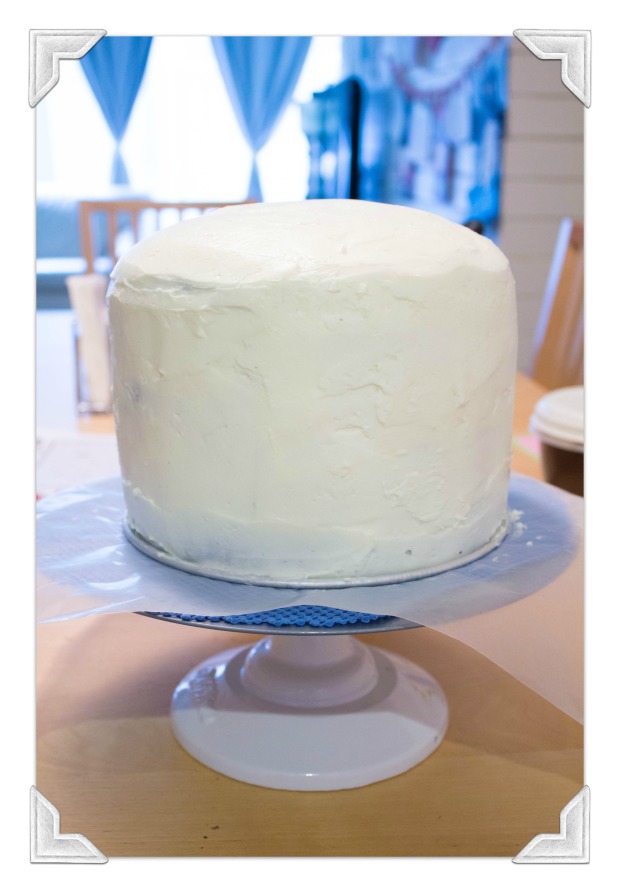
Smooth on your vanilla buttercream frosting with an offset spatula and refrigerate again while you work on rolling out some fondant. Notice how I frosted my cake pan, the bottom layer of my “cake”.

Shopkins (12 of 24)pm

After you work your fondant with your hands to get it pliable again, roll it out as big as you can.  I wasn’t able to get it big enough to drape over the entire cake, so I just cut out two 6″ strips (height of the side of cake) and stuck it on.  Get a wet paper towel and run it over your fondant so it will stick to the cake. (dampen only the side that will be touching the cake)

Shopkins (13 of 24)pm

Carefully smooth it out with your hands or a fondant smoother tool.

Shopkins (15 of 24)pm

I used two strips to cover the sides of the cake. (you can see the small seam on the left)  It’s okay, I’m going to add the arms there later.

Shopkins (16 of 24)pm

Roll our your white fondant, then use an 8″ cake base (cheese board from Dollar tree) as a guide to cut out a circle.  You want enough of the white fondant to come over the side of the cake.

Shopkins (17 of 24)pm

Use a sharp knife to cut around the fondant like above to achieve the look of icing drips.

Shopkins (19 of 24)pm

Again, dab a wet paper towel over the fondant, then carefully position over the top of the cake.

Shopkins (20 of 24)pm

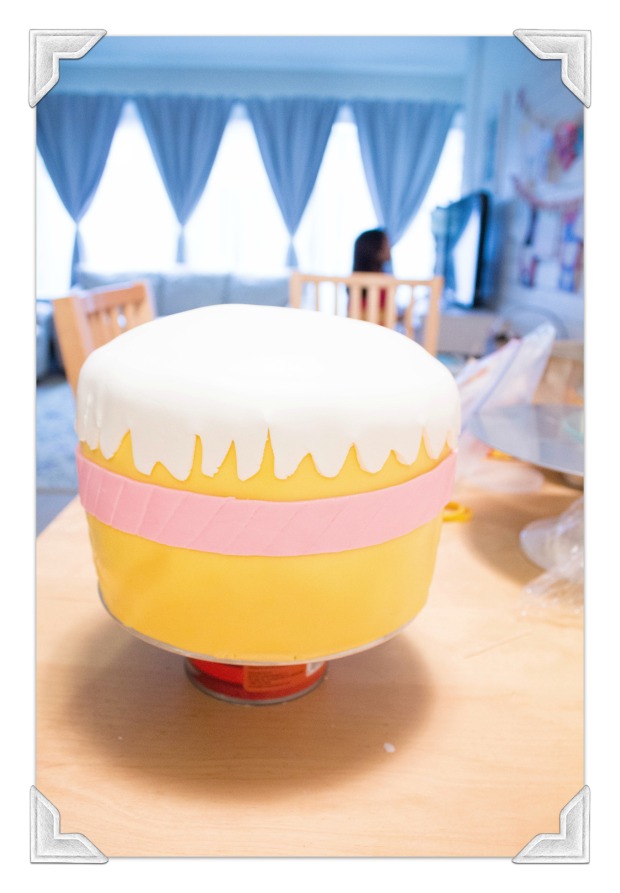
Now for the pink band around Wishes.   Roll and cut out an appropriate sized band
Shopkins (21 of 24)pm

Stick it on with some water then use a blunt knife or I used a wooden skewer to make the slanted indent patterns on the pink band.

Shopkins (22 of 24)pm

Now make your eyes, nose, arms, and lips and attach with some water!  It already looks so cute!

Shopkins (23 of 24)pm

Make 3 white snakes then coil into these little swirls


Avie2016_party (25 of 39)pm

Attach the swirls and make some white “sprinkles” and the cake is complete!  She wanted a “6” on her cake and didn’t want just green candles (which is what Wishes has).

Avie2016_party (37 of 39)pm

She loved her little party and was so excited she kept hugging me and telling me ‘thank you’.  That’s what makes my Saturday spent on a birthday cake, all worth it!

Avie2016_party (38 of 39)pm

Eating a slice or two of cake helps, too.

Chocolate Fudge Cake

adapted from Toba Garrett’s “The Well Decorated Cake”

Ingredients

  • 1 cup (2 sticks) unsalted butter
  • 1  1/4 cups granulated sugar
  • 3/4 cup dark brown sugar, packed
  • 2  1/2 cups all-purpose flour
  • 1 cup Dutch processed cocoa powder
  • 2  1/4 tsp baking soda
  • 1  1/2 tsp salt
  • 2 large eggs, room temp.
  • 1  1/2 tsp pure vanilla extract
  • 2  1/4 cups buttermilk
  • 6 oz. melted semisweet chocolate (good quality), melted

Directions

  1. Preheat oven to 350 F.  Grease and parchment line two 8″ cake pans (2″ high).  Melt chocolate, set aside.
  2. Beat butter and sugars together on med- low speed until fluffy.
  3. Mix together the flour, cocoa powder, baking soda, and salt together in a separate bowl, set aside
  4. Add eggs into the butter mixture, scraping bowl as needed.  Add vanilla.
  5. Add in a third of the flour mixture, mix. then a half of the buttermilk.  Mix and scrape bowl. Repeat until you have ended with the rest of your flour mixture.  Scrape bowl.
  6. Add in your melted chocolate and beat on med-high until well mixed.  Scraping bowl as needed.
  7. Pour into your prepared cake pans and bake in preheated oven for about 50 mins or until toothpick comes out clean.
  8. Cool in pan for 10 mins then remove carefully onto cooling rack.
  9. Frost cake after completely cool.
Shopkins (24 of 24)pm

Her friends got to go home with these cute Shopkins keychains from the supplies I had left from a past party where I had bottlecap necklaces.

Shopkins (10 of 24)pm

I found that printable for free on pinterest and taped them onto pink craft bags.  My girl is into word searches so they got a word search booklet and mechanical pencil (from Dollar Tree) and a pretzel rod dipped in white chocolate w/ sprinkles, plus the keychains.


Good luck with your baking adventure!  Thank you for reading and please subscribe!

-Flora

More Gingermelon Dolls!


I absolutely LOVE how these dolls came out and had to share!   I revisited the Gingermelon Pocket Polly felt dolls this week and finally finished these dolls for my friend’s girls.  Kind of exciting with it being my first sale, but with how long it took me to finish the dolls… I wonder if I want to be cranking them out to sell when I’m the one making them by hand.  It’s not a difficult pattern, but the embroidery for the face and adding the hair is definitely more time consuming and a bit tedious.  I worked on these dolls over the course of a *ahem* a couple months.  I cut them out and let them rest, I embroidered on their faces then let them rest, I stuffed and sewed their bodies then let the rest… you get the picture.

PicMonkey Collage2

My daughter said the dolly with the white hair looks like Elsa.   I thought about giving her an icy blue dress to really make her look like Elsa, but I think I’ve had enough “Frozen” to last me for years.  I loved the movie when it first came out but Disney went a little overboard with it’s Frozen marketing and I see it EVERYWHERE; and let’s just say I need a break from the royal Arendelle sisters.  But, we did watch Frozen Disney on Ice this past week in Oakland and of course my girls were so enthralled that it made the drive, crazy $40 parking fee, the will call, the lines, the “you’re in my seat”, all worth it.

PicMonkey Collage

I added simple details to their dresses and used shaped craft scissors to cut the hems of their dresses to give it that scalloped look.  I really like the blonde dolly.  Reminds me of a fairytale character; like Goldilocks or put a red hood on her and she’d be Little Red Riding Hod.  Just so cute!

If you missed my previous post on these insanely cute felt dolls and how to make them, click here.

IMG_2107_pm

Thank you for visiting and reading.

-Flora

Umma’s Kimchi (Napa Cabbage Kimchi)

IMG_1839_ummakimchi

I have a confession to make.  I am Korean.  Okay, that wasn’t my confession.  Here it is:

I am Korean.  And I buy my kimchi.  -_-  I know, I know.  I don’t deserve to lay claim to my Korean roots if I don’t make my own kimchi or own a kimchi refrigerator.  (Yes, there is such a fridge and it keeps kimchi and regular produce fresh forEVER!)  But wait, do you know what kimchi is?  It’s only the best, tastiest, and healthiest Korean mealtime staple with natural probiotics and lots of Vitamin A and C.  Basically it’s fermented Chinese cabbage (can also be made from a variety of other vegetables and seasonings) that is eaten as a side dish and ranges from mild to spicy, to watery, to fishy.

My mom’s visiting and I’m taking full advantage of her Korean cooking skills and documenting her kimchi-making process so I can try to replicate it next time I run out of her kimchi.  I’ve made kimchi by myself once before in my lifetime and I must confess it was a fail.  My mom sort of walked through the steps and ingredients with me over the phone and I tried to mimic it… and well… it just wasn’t the same.  Hopefully, standing over her shoulder and breathing down her neck while watching her make this kimchi will help me the next time I attempt it.  We sort of measured the ingredients as she went along because, like many Korean moms out there, her measurements and recipe is in her head and her hand.  She just sort of eyeballs it and adds more or less by taste.  I was probably frustrating her whenever I stopped her to measure the ingredients 🙂  but she was super patient with me.  So here is how my mom makes her kimchi:


IMG_1752

Add lots of salt to a bucket of water (should taste like the sea). We used Kosher Salt because I don’t have Kimchi salt, but my mom prefers to use Kimchi salt (which might be the same as rock salt).


IMG_1755

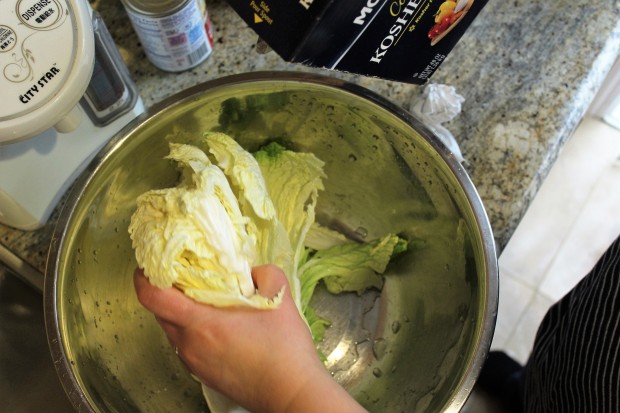
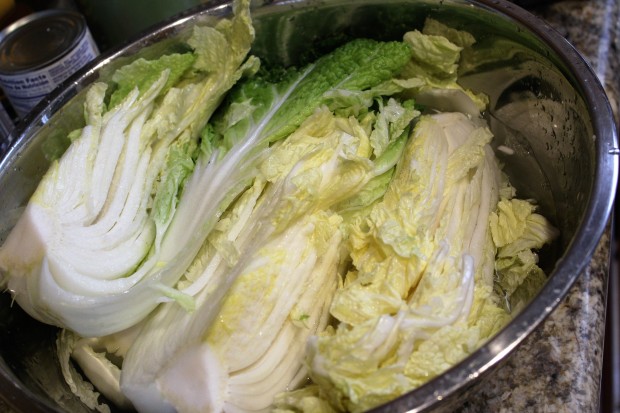
Slice your cabbage in half, vertically.

IMG_1754

Slice again, so you have quartered your cabbage. Cut off the hard core/stem, but we want enough of the stem to keep the leaves together.

IMG_1758

Dunk your cabbage quarters in the brine water, let it drain, then salt between each leaf, concentrating on the thicker, white (non-leafy) portion of the cabbage.  Repeat for all.

Here’s a quick video to help you (and me) see how to prep/brine the cabbage.


IMG_1765

After salting all the cabbage, pour the rest of the salt water over the cabbage and let it brine for about 2-3 hours. (depends on how much salt and water.  taste it after 2 hours to determine)

IMG_1766

Turn and rotate the cabbage halfway through brining


Meanwhile, make the kimchi paste/marinade by chopping your onion, Korean pear, ginger, garlic, and radish, place in a blender, add your fish sauce, then puree.

IMG_1811

Add your red pepper flakes and brown sugar to your puree and you have your kimchi paste

After the cabbage is salty enough, dump out the salt water, then rinse your cabbage in running water 2-3 times and let drain for about 30 mins.  Now get on some food service gloves (the red pepper on your skin will sting) and smear on that kimchi paste all over and between the cabbage leaves.  “Wrap” the outer most leaf around the quarter of cabbage then carefully tuck into a glass jar.  Fill the jar (cover w/ lid) then place in the refrigerator (or to eat it sooner, leave it out at room temperature for a day).  And you lucky ducks with a kimchi refrigerator, you know what to do.

Ingredients

  • 2 Napa (Chinese) Cabbage, washed
  • Lots of Coarse salt (Preferably Kimchi salt)
  • 1 cup fish sauce (I used Tiparos brand Thai Fish Sauce. Korean ones are saltier and less sweet, so add more or less according to taste)
  • 1/2 onion, chopped
  • 1/2 Korean pear, chopped
  • 1 cup Daikon radish, chopped
  • 1 inch ginger root, chopped
  • ~13 cloves garlic, sliced
  • 1 ½ cups coarse red pepper flakes
  • 1 TB brown sugar

*You will need a big, wide bowl to brine, a bucket, food service gloves, and wide-mouth glass (preferably) jar to store kimchi)

Directions

  1. Add lots of salt to a bucket of water (should taste like the sea)
  2. Slice your cabbage in half, vertically. Then slice again, vertically, so you have quartered your cabbage.
  3. Cut off the hard core/stem, but we want enough of the stem to keep the leaves together.
  4. Dunk your cabbage quarters in the brine water, let it drain, then salt between each leaf, concentrating on the thicker, white (non-leafy) portion of the cabbage.  Repeat for all.
  5. After salting all the cabbage, pour the rest of the salt water over the cabbage and let it brine for about 2-3 hours turning and rotating the cabbage halfway through brine period . (depends on how much salt and water.  taste it after 2 hours to determine)
  6. Meanwhile, make the kimchi paste/marinade by chopping your onion, Korean pear, ginger, garlic, and radish, place in a blender, add your fish sauce, then puree.
  7. Add your red pepper flakes and brown sugar to your puree and you have your kimchi paste
  8. After the cabbage is salty enough, dump out the salt water, then rinse your cabbage in running water 2-3 times and let drain for about 30 mins.
  9. With food service gloves (the red pepper on your skin will sting), smear on the kimchi paste over and between the cabbage leaves.
  10. “Wrap” the outer most leaf around the quarter of cabbage then carefully tuck into a glass jar.  Fill the jar (cover w/ lid) then place in the refrigerator (or to eat it sooner, leave it out at room temperature for a day).  And you lucky ducks with a kimchi refrigerator, you know what to do.

*I bought only one Napa cabbage but the recipe makes enough kimchi paste for two Napa cabbages so the recipe calls for two of the cabbages.

IMG_1837_jjangkimchi

Good luck to you (and to me)!

Thanks for reading!

-Flora (and my mom)

Kimchi Queso Dip-mom approved

IMG_1748_kimchiquesoToday’s post will be short and sweet.  My mom’s visiting from WA and time has just flown by MUCh too quickly.  She’s leaving this weekend and I’m wishing this week will be one of those weeks that drags, but it won’t really “drag” because I have my momma.  I still have so much that I want to do with her; haven’t even made a dent in my mental list of things I was planning to do with her.  But I did make her this kimchi dip from the Buzzfeed recipe I saw floating around Facebook.  It was hubby who showed me the video of the dip last night and I couldn’t wait to try it!

Yes, I’m Korean and I love my kimchi!  I figured I should make it when my fellow kimchi enthusiast (aka: my mom) was in town to help me enjoy it.  Don’t worry, Ken, I saved you some.

In case you were wondering if it was super spicy…  I halved the recipe and added:

  • 2 1/2 cups shredded cheddar cheese
  • 1/2 cup sour cream
  • 1 TB red pepper flakes
  • 3/4 cup kimchi, chopped
  • 1 green onion, chopped

It was NOT spicy.  OK, I guess it depends on your spice-o-meter, but I didn’t really think it was spicy.  The sour cream and cheese probably helps tone down the spicy factor.  I personally would add more kimchi next time around since I like having more of the kimchi crunch in each bite.

IMG_1751

Here’s the link to the recipe:  Kimchi Queso Dip from Buzzfeed.com

and to make your life (browser tab) easier… recipe from their site that I used:

Kimchi Queso Dip

  • 1 1/2 cups chopped Kimchi
  • 2-3 TBSP Korean Red Pepper Powder (depending on how spicy you want it)
  • 5 cups shredded cheddar cheese
  • 1 cup sour cream
  • 1 green onion chopped

Directions:

In a medium sauce pan, melt cheddar cheese part way (until it’s mostly soft but still clumpy) then add the sour cream. Melt and stir until the mixture is smooth. Add the red pepper powder and stir until evenly integrated. Add kimchi and simmer until evenly mixed and smooth. The liquid from the kimchi may give the appearance that the queso is chunky, continue heating and stirring 5-10 minutes and it will smooth out. Serve garnished with chopped green onion. Goes great with chips, raw vegetables, or straight into the mouth via spoon.


“Thunder Cake” Happened…

IMG_1720_pm_polaroid

I borrowed this book ,”Thunder Cake”, from the library a couple weeks ago to read to my children when it was raining nonstop here in the bay area and we had some hail and thunder (but alas, we saw no lightning, much to my son’s dismay).  Maybe because of the hills, trees, and homes that block our view of the sky…  But as my High School Chemistry teacher always used to say, “we digress”!

This book is a story about a little girl who is afraid of everything, especially thunder, and how her grandmother “distracts” her into overcoming her fears as they gather the ingredients to make this special ‘thunder cake’ that needs to go into the oven right when the thunderstorm is above them.  Much to my children’s delight, there was a recipe at the end of the book for this special thunder cake which uses a surprising secret ingredient in the chocolate cake that (I must admit) made me giddy with excitement to try.

IMG_1717_pm_polaroid

We did our own “gathering” of ingredients for the cake, most of which I already had stocked in my pantry, but we ran to the store to buy the ‘secret’ ingredient and some strawberries.   Our run to the store could have been spared since we didn’t end up baking the cake until today and only because the strawberries wouldn’t last any longer if we didn’t bake it and I didn’t want to make another run to the store for one ingredient.

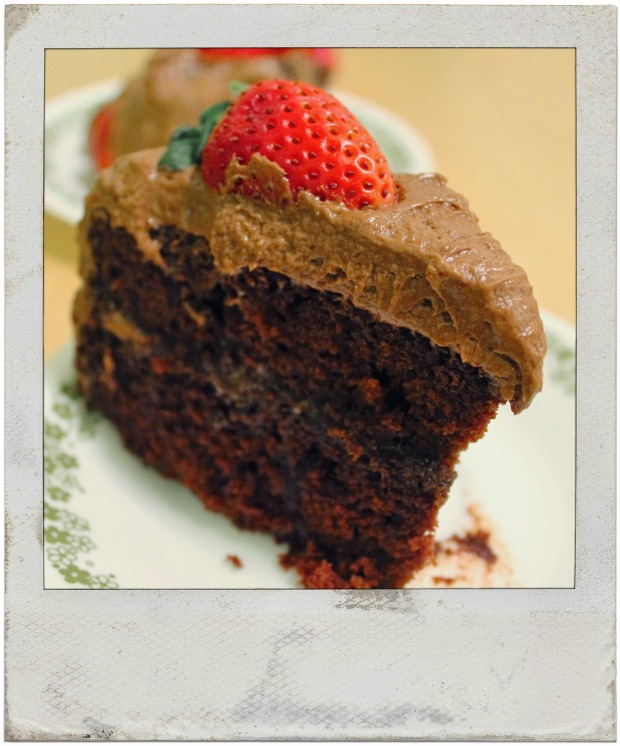
So what is the ‘secret’ ingredient you ask?  Well, it’s pureed tomatoes!  Isn’t that something?  I was skeptical but hopeful that it would turn out into a delicious chocolate cake and BOY, did it turn out into a scrumptious chocolate cake! And dare I say, it may be the best tasting chocolate cake EVER, especially paired with some light, fluffy chocolate frosting and fresh strawberries.  My kids are funny.  They start with the strawberries and then they eat the cake.  Every morning, I give them their fruit after their ‘main’ otherwise, they won’t finish their food and only eat the fruit.

IMG_1718_pm_polaroid

*SEE BELOW for UPDATED METHOD!!! Some pointers about making the cake.  The recipe really doesn’t give the step-by-step directions I’m used to in a recipe, but having baked enough cakes in my life, I started off creaming the butter (I substituted the shortening for unsalted butter) then added the sugar, vanilla, and egg yolks.  Then I transferred the butter mixture to a large bowl, thoroughly cleaned and dried my stand mixing bowl to whip the egg whites until stiff peaks form.  I sifted the dry ingredients together and set it aside.  But here is where I panicked!  I added the water and pureed tomatoes to the butter mixture and of course with that much water, the butter is NOT going to incorporate it and looked like a curdled mess with the tomato puree and water mix.  But I just kept going, putting trust in the recipe (and crossing my fingers that it would turn out).  I started adding the flour mixture into the butter mixture then folded in some of the egg whites and repeated until I had cake batter!  It looked lumpy with butter still not incorporated in the liquid, but I still baked it according to the recipe and the cake turned out great!  It really tastes SO soft and moist!

*1/14/2016  So, I had to make this cake again and found a much better way to make this cake batter come together without lumps of butter.  

  1. Preheat oven to 350F . Grease and flour two 8-inch cake pans
  2. Cream together butter, sugar, vanilla, and the egg yolks.
  3. Sift together the dry ingredients and set aside.
  4. Measure out the cold water and pureed tomatoes. (I strained it so no seeds or tomato skin pieces) 
  5. With the mixer on low speed, add a third of the dry mix to the butter mixture, next add half of the tomato/water mixture, then another third of the flour mixture, the rest of the tomato/water mixture, and finally the remaining third of the flour mixture.  (So basically dry, wet, dry, wet, dry into the butter mixture.)
  6. In a clean, dry mixing bowl, whip the egg whites until stiff peaks form w/ whip attachment.  
  7. Carefully fold the egg whites into the cake batter.
  8. Divide the cake batter evenly into the two cake pans and bake about 30- 35 mins (toothpick test)

P.S.  I used fresh pureed tomatoes (and my son drank the rest and wanted more 🙂

IMG_1725_pm

Oftentimes, I find butter cakes to be not as moist and soft as cake mixes, but this cake is so soft like a cake mix and tastes delicious!  I could only slightly taste a hint of the tomato (maybe because I knew there was tomato in it… the hubby couldn’t tell), but it was very good and even gives the cake a slightly red-velvet cake-ish hue.  I’m curious how the tomato helps the cake taste so good!

Now, the recipe in the book only says to frost the cake with a chocolate butter frosting.  SO, I used this chocolate frosting recipe:

Chocolate Buttercream Frosting

  • 6 oz semisweet chocolate (melted)
  • 1 cup (2 sticks) unsalted butter
  • 2 cups powdered sugar
  • 1 tsp vanilla extract
  • pinch of salt

I melt the chocolate carefully in the microwave at 50% power in 30 sec increments or you can melt using the double boiler method.  Beat the butter until light, then add the powdered sugar, vanilla, and salt until light and fluffy.  Then add the melted chocolate (shouldn’t be hot).

After tasting the frosting, I decided I wanted to lighten up the frosting and whipped about a cup of whipping heavy cream added a bit of powdered sugar then folded it into the buttercream frosting.  It made the creamy, intense chocolate frosting, into more of a chocolate mousse-like lighter frosting that I think paired perfectly with this cake and the strawberries.

So, there.

IMG_1724_pm_polaroid

Who knew pureed tomatoes could make the best chocolate cake, ever!!!

My 7 yrs. old has already requested that I make a copy of the recipe and save it so he can have it for his birthday (which is not ’til Sept).  Then his 5 yrs old sister chimed in and said she wanted the same!  It’s really that good!  Don’t believe me?  You’ve got to try it yourself!

Daddy came home while we were enjoying dessert so he got to read the book “Thunder Cake” to them while they ate their ‘thunder cake’!  Nothing grand going on here, but they were all so happy.  It’s the little things that count.  🙂  I love my family.

IMG_1731_polaroidfilm

Thanks for reading!


Love,

Flora